Hi Everyone
I
FINALLY!! finished my reversible Quilt As You Go baby quilt. I did the tutorials for the individual blocks in October. One is titled "Preview of Work" on October 5th and the other one is "Snowball Block" on October 8th. This method will work on any quilt blocks.
QUILT AS YOU GO
Preparing & Quilting Blocks
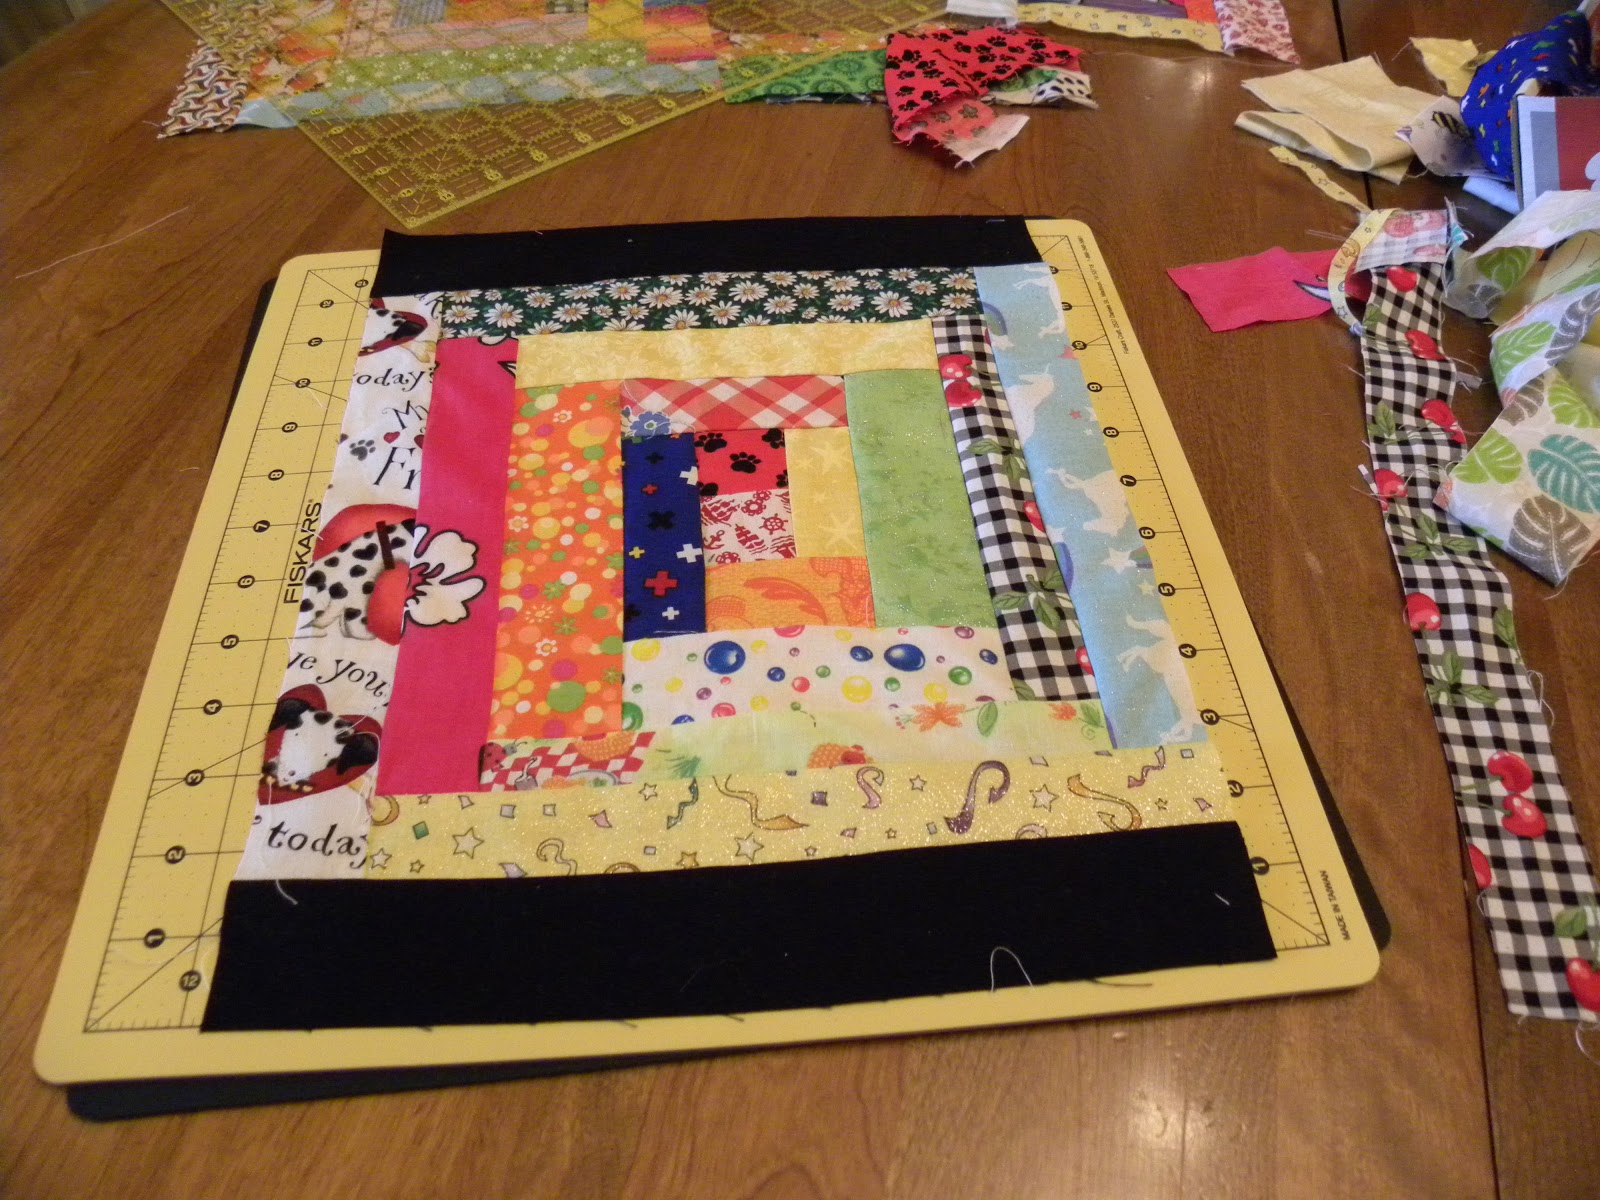
1. Trim your blocks that they are all the same size. My blocks are 9 1/2 inches unfinished.
2. Cut your batting the same size as your squares
3. If you are making a reversible quilt decide which blocks will be the back of the quilt and which will be the front. For my quilt the "Wacky Nine Patch" was the back and the "Snowball" the front.
4. Place one of Wacky Nine Patch (WNP) front side down. (If you are not doing these blocks if will be whatever you picked for your back.)
5. Place your batting square on top. I used quilt basting spray, so I sprayed my batting before I placed it on top of the block.
6. Place your Snowball block on top of batting. Make sure all three layers are smooth and baste. This can be done with thread basting, using quilt safety pins or a basting spray.
7. Repeat steps 4-6 for all your blocks. Quilt each blocks.
Adding Sashing - Joining Blocks & Rows
8. If you plan on having your blocks in a pattern lay out your blocks before you start sewing them together.
9. Cut your sashing the joining your blocks in rows. The sashing for the front of your quilt is cut 1 inch by the length on your block. The sashing for the back is cut 1 3/4 inch by the length of the block. This piece is folded in half. It is easier if you cut all your sashing for joining your blocks in rows at the same time. You will cut your sashing to join your rows later.
10. Place the 1 inch sash on the left side of the front block. Place the folded sash on the back with the opening along the edge. (This is done in the same way you would sew binding.) Pin all three layers together
11. Sew with a 1/4 inch seam allowance.
12. Press the front 1 inch seam away from the block Do not press the back seam.
13. Take your next block in the first row and sew it to the front 1 inch sashing.
14. Repeat steps 10 - 13 to the left side of all the blocks except for the last block in each row.
15. You have just finished doing the front of your rows. The back needs to be slipped stitched in place. I finished my rows before I did this step, but it can do this step any time before you put your rows together
16. After you have all your rows sewed together you are ready to join the rows. There is two ways to do this. One way is to measure the length of your row and cut your front & back sashing that length. The other way is to cut long strips from your fabric and pin it and then trim. Sew the sashing on.
17. Sew your rows together in the same way you sewed your block. You also need to slip stitch the back sashing.
Adding Border
18. Cut sashing for your inner border. The border will be cut the same width, 1 inch &1 3/4 inch which is folded. Measure and pin the top & bottom of your quilt. Sew with 1/4 inch seams. Press the front sashing out. This is the same as you have been doing. Slip stitch the back stitching.
19. Making the top & bottom border. Remeasure your quilt to get the measurements of the top & bottom. Cut your front and back border plus your sashing the length plus whatever width you want you border. Don't forget to add seam allowance. For example is your border is going to be 3 inches cut it at 3 1/2 inches
20. After you cut the batting & fabric for the top and the bottom you will quilt them the same way you did for your blocks. (See steps 4-6)
I cut my batting a little bigger and trimmed it down. I don't think it is necessary to cut it bigger.
21. Pin and sew the border on the same way you sewed the blocks and rows together. At this point I made the sashing on both the front and back the same material which was yellow. Before I had white on the front and blue on the back.
22. For my side borders I wanted the yellow sashing to only go along my blocks and the remainder to match my borders. I measured the length of my quilt from the top and bottom yellow sashing and then cut the sashing strips that length. Don't forget you need to cut strips for both the front and back of the quilt the same width as you have been doing. Then I measured the width of the top and bottom border and cut four pieces, two for the front and two for the back.
23. Pin the borders on each side and sew with a 1/4 inch seam allowance.
24. Sew down the sashing on the back.
25. Cut 2 strips for your binding the width of the quilt by 1 3/4 inches. Fold in half . Pin the open side to the edge of the front side on the quilt. Sew with a 1/4 inch seam allowance. Press open , away from the quilt. Do the same with the two sides of the quilt
26. Fold the binding to the back of the quilt and slip stitch down.
You have finished your reversible Quilt As You Go quilt.